Vehicles Tab
The vehicles tab can be used to manage the vehicles for each client. Vehicles can be added, updated or removed from the client's record. Vehicles entered here can be used when completing a schedule by using the Lookup feature on the schedule.
Quickly navigate to procedures included in this topic by clicking one of the links below:
To Access the Vehicles Tab
To Add a New Commercial Vehicle
To Add a New Personal Vehicle
To Edit a Vehicle
To Delete a Vehicle
To Inactivate a Vehicle
To Access the Vehicles Tab
- On the Primary menu, click SEARCH. Search for the appropriate client.
- Click the Details
 icon next to the appropriate client. The card file tab is displayed by default.
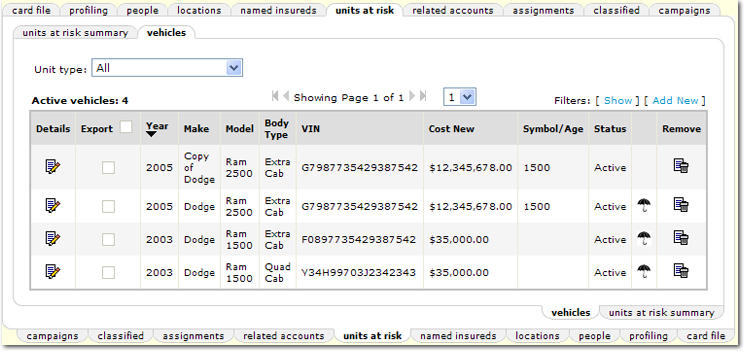
- Click the units at risk tab. The units at risk summary tab is displayed.
- Click the vehicles tab. The vehicles tab is displayed if vehicles already exist. If no vehicles exist, there will not be a vehicle tab. If there is no vehicles tab, use the units at risk tab to add a vehicle.
- The first option available is the Unit Type selection. This list defaults to the summary of vehicles that match the account type. For example, if the client has a Personal account, the Unit Type will show the selection for the personal vehicles. Use this list to select:
- All
- Vehicles - Commercial
- Vehicles - Personal
Note: When All is selected, the import and export options are not available. An import or export of both personal and commercial records at the same time is not possible because of the difference in the information.
- The following options and information are displayed on the vehicles tab:
- On the vehicles tab, the ability to [Import] and [Export] lists of vehicles is available. When working with imports and exports:
- An export must be performed first to get a working spreadsheet for importing.
- Use the check boxes to select the vehicles records to be exported.
Important: System generated IDs on the exported spreadsheet should not be changed, added or copied. The absence of an ID upon import will denote an item to be added.
- In the Microsoft® Excel® spreadsheet, place an X in the Remove
 column in order to remove the item upon import.
Tip: In order to avoid Updated By user name and date being changed on records that have not been modified, it is suggested that those records be removed before the import takes place.
- Filters: Click [Show] / [Hide] to toggle the filter screen open and closed.
- [Add New]: Opens the Add New Commercial Vehicle or Add New Personal Vehicle screen to enter a new vehicle. Either the personal or commercial screens are displayed depending on the selection made on the summary screen in the Unit Type list. If the Unit Type selection is set to All, the add new form will default to the Unit Type that matches the type of account for the client.
- Column headers can be clicked to sort the summary by the selected column header in ascending or descending order. The following columns can be sorted:
- Year
- Make
- Model
- Body Type
- VIN
- Cost New
- Symbol / Age
- Status
- Details: Click on the Details icon to open the Personal Vehicle or Commercial Vehicle screen to edit the vehicle record.
- Status: Indicates whether the vehicle is Active or Inactive.
- Linked Unit: The Umbrella
 icon is displayed once a unit has been linked to a policy using Lookup or servicing.
- Remove: Click the Remove icon to remove the vehicle from the client records. If a unit is linked, it cannot be removed, however, it can be made inactive.
To Add a New Commercial Vehicle
- On the Primary menu, click SEARCH. Search for the appropriate client.
- Click the Details icon next to the appropriate client. The card file tab is displayed by default.
- Click the units at risk tab. The units at risk summary tab is displayed.
- Click the vehicles tab if vehicles tab exists or select [Add New] from the units at risk summary tab.
- In the Unit Type list, select the Vehicles - Commercial option. If no vehicles exist, there will not be a vehicle tab. If there is no vehicles tab, click [Add New] to add a vehicle.
- Click [Add New]. The Add New Commercial Vehicle screen is displayed. Complete the following:
- Vehicle #: Enter the vehicle number up to nine digits. This information does not prefill to an ACORD form.
- The following entries can be prefilled by Lookup to the ACORD 127 Vehicles section, Details - Type subsection:
- Year: Enter the year of the vehicle. This is a required entry.
- Make: Enter the make of the vehicle. Up to 15 characters can be entered. This is a required entry.
- Model: Enter the model of the vehicle. Up to 15 characters can be entered.
- VIN: Enter the vehicle identification number. The number can be up to 17 characters.
- Body type: Enter the body type of the vehicle. Up to 20 characters can be entered.
- Vehicle type: Select the vehicle type from the list. The following options are available:
- Blank (default)
- PP
- SPEC
- COML
- The following entries can be prefilled by Lookup to the ACORD 127 Vehicles section, Details - Garaging Address subsection:
- Garaging City: Enter the name of the city in which the vehicle garaged. Up to 20 characters can be entered.
- Garaging State / Prov: Select the state or province in which the vehicle is garaged.
- Garaging Zip / Postal: Enter the garaging zip or postal code. Up to 10 digits can be entered.
- The following entries can be prefilled by Lookup to the ACORD 127 Vehicles section, Details - Rating subsection:
- Symbol / Age: Enter the symbol / age of the vehicle. Up to five digits can be entered.
- Cost new: Enter the cost of the vehicle when it was new. Up to eight characters can be entered.
- Licensed St / Prov: Select the state or province in which the vehicle is licensed.
- Weight / Combined weight: Enter the vehicle's weight. Up to 10 characters can be entered.
- SIC Code: Enter the SIC code for the vehicle. Up to four digits can be entered.
- Seating capacity: Enter the seating capacity of the vehicle. Up to four characters can be entered.
- Radius of Use: Enter the radius of the area in which the vehicle will be used. Up to five characters can be entered.
- Farthest Terminal: Enter the name of the farthest terminal for the vehicle. Up to 13 characters can be entered.
- Driven to work / school: Select either less than or more than 15 miles to indicate how far the vehicle is driven. The default selection is blank.
- Vehicle use: Select the type of use for the vehicle. The following options are available.
- Blank (default)
- Pleasure
- Farm
- Commercial
- Retail
- Service
- After all information is added to the Add New Commercial Vehicle screen, click [Save]. The vehicle is added.
Or
Click [Cancel] to return to the summary of vehicles without saving any data entered.
- After a vehicle is added, click the Details
 icon for the vehicle. Notice two new options become available: [Copy] and [Inactivate].
- Click [Copy] to make a copy of the vehicle record. The new copy will be available on the summary screen with the text "Copy of" preceding the name of the Make of the vehicle. All data will be copied except the vehicle number.
Tip: Clicking [Copy] will also save any changes made to the vehicle details.
- Click [Inactivate] to inactivate the vehicle. Inactive vehicles will not be available in the policy level Lookup option.
To Add a New Personal Vehicle
- On the Primary menu, click SEARCH. Search for the appropriate client.
- Click the Details icon next to the appropriate client. The card file tab is displayed by default.
- Click the units at risk tab. The units at risk summary tab is displayed.
- Click the vehicles tab. The vehicles tab is displayed.
- In the Unit Type list, select the Vehicles - Personal option. If no vehicles exist, there will not be a vehicles tab. If there is no vehicles tab, click [Add New] to use the units at risk summary tab to add a vehicle.
- Click [Add New]. The Add New Personal Vehicle screen is displayed. Complete the following:
- Vehicle #: Enter the vehicle number up to 9 digits. This information does not prefill to an ACORD form.
- The following entries can be prefilled by Lookup to the ACORD 90 Vehicles section, Details - Types subsection:
- Year: Enter the year of the vehicle. This is a required entry. Four digits must be entered.
- Make: Enter the make of the vehicle. Up to 15 characters can be entered. This is a required entry.
- Model: Enter the model of the vehicle. Up to 15 characters can be entered.
- VIN: Enter the vehicle identification number. The number can be up to 17 characters.
- Body type: Enter the body type of the vehicle. Up to 20 characters can be entered.
- Symbol / Age: Enter the symbol / age of the vehicle. Up to 4 digits can be entered.
- Class: Enter the class of the vehicle. Up to 8 digits can be entered.
- The following entries can be prefilled by Lookup to the ACORD 90 Vehicles section, Details - Usage subsection:
- Registration State / Prov: Select the state or province in which the vehicle is registered.
- Date Leased: Enter the date the vehicle was leased. Use the format MM/YYYY.
- Date Purchased: Enter the date the vehicle was purchased. Use the format MM/YYYY.
- Purchased New or Used: Make a selection to indicate whether the vehicle was purchased New or Used.
- Cost new: Enter the cost of the vehicle when it was new. Up to 8 characters can be entered.
- Miles One Way: Enter the number of miles driven one way. Up to 3 digits can be entered.
- Days Per Week: Enter the number of days per week that the vehicle is driven.
- Weeks Per Month: Enter the number of weeks per month that the vehicle is driven.
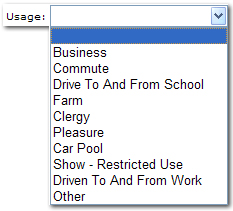
- Usage: Select the type of usage for the vehicle. The following options are available:
- Odometer Reading: Enter the odometer reading up to 8 digits.
- Estimated Annual Future Mileage: Enter the estimated annual mileage. Up to 8 digits can be entered.
- The following entries can be prefilled by Lookup to the ACORD 90 Vehicles section, Details - Features subsection:
- Horsepower: Enter the horsepower of the vehicle. Enter up to 3 digits.
- Number of Cylinders: Enter the number of cylinders for the vehicle. Enter up to 2 digits.
- Performance Code: Select one of the following to indicate the type of performance of the vehicle.

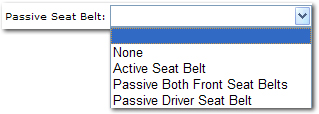
- Passive Seat Belt: Select one of the following to indicate the type of seat belts that are in the vehicle.
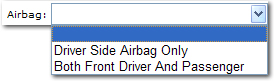
- Airbag: Select one of the following to indicate the type of airbags available in the vehicle.
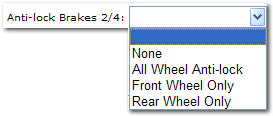
- Anti-lock Breaks 2 / 4: Select one of the following to indicate the type of anti-lock breaks available on the vehicle.
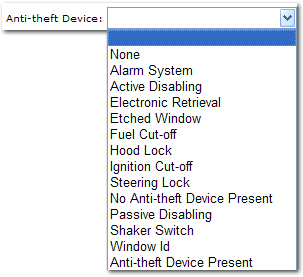
- Anti-theft Device: Select one of the following to indicate the type of anti-theft device available on the vehicle.
- After all information is added to the Add New Personal Vehicle screen, click [Save]. The vehicle is added.
Or
Click [Cancel] to return to the summary of vehicles without saving any data entered.
- After a vehicle is added, click the Details icon for the vehicle. Notice two new options become available: [Copy] and [Inactivate].
- Click [Copy] to make a copy of the vehicle record. The new copy will be available on the summary screen with the text "Copy of" preceding the name of the Make of the vehicle. All data will be copied except the vehicle number.
Tip: Clicking [Copy] will also save any changes made to the vehicle details.
- Click [Inactivate] to inactivate the vehicle. Inactive vehicles will not be available in the policy level Lookup option.
To Edit a Vehicle
- On the Primary menu, click SEARCH. Search for the appropriate client.
- Click the Details icon next to the appropriate client. The card file tab is displayed by default.
- Click the units at risk tab. The units at risk summary tab is displayed.
- Click the vehicles tab. The vehicles tab is displayed.
- Click the Details icon next to the vehicle to be edited. The Personal Vehicle or Commercial Vehicle screen is displayed depending on the Unit Type selected on the vehicles tab.
- Make any necessary changes to the record and click [Save].
Important: When new units that have been prefilled to a policy either by Lookup or the units at risk tab and are added, modified, or deleted, a dialog box will be displayed once [Save], [Copy], or [Inactivate] are selected. The dialog box will list all policies that the unit is associated with. Any policy in a pliable state will be available for selection in the dialog box. Selecting a policy or policies and then clicking Update Selected will make the change, addition or deletion of the unit to all policies selected.

To Delete a Vehicle
- On the Primary menu, click SEARCH. Search for the appropriate client.
- Click the Details icon next to the appropriate client. The card file tab is displayed by default.
- Click the units at risk tab. The units at risk summary tab is displayed.
- Click the vehicles tab. The vehicles tab is displayed if there are vehicles associated with this client.
- Click the Remove
 icon and the vehicle will be deleted from the client record. If the unit is linked, it cannot be removed. The unit can be made inactive if necessary.
- If there is an Umbrella icon next to the vehicle, that means the vehicle is associated to a policy. In this case, the vehicle cannot be directly deleted with the Remove icon, but can be made inactive.
To Inactivate a Vehicle
- Click the vehicle Details icon. The vehicle details are displayed. At the top of the details screen, the [Inactivate] link is available. This link is a toggle to make the vehicle either active or inactive. If the vehicle is made inactive, the record will still remain with the client but will not be displayed on the vehicles tab unless the Filters are changed to include inactive vehicles.
Units at Risk Tab